How to Set Up WISPR UAS Flight Controller With Custom Flight Firmware
2/23/2023

Open mission planner
Connect a USB A to your laptop with Mission Planner and then you will need a Micro USB to plug into the back of the UAV to peform all of these steps.
Do not connect the drone to Mission Planner.
Go to setup → install firmware → Load Custom Firmware
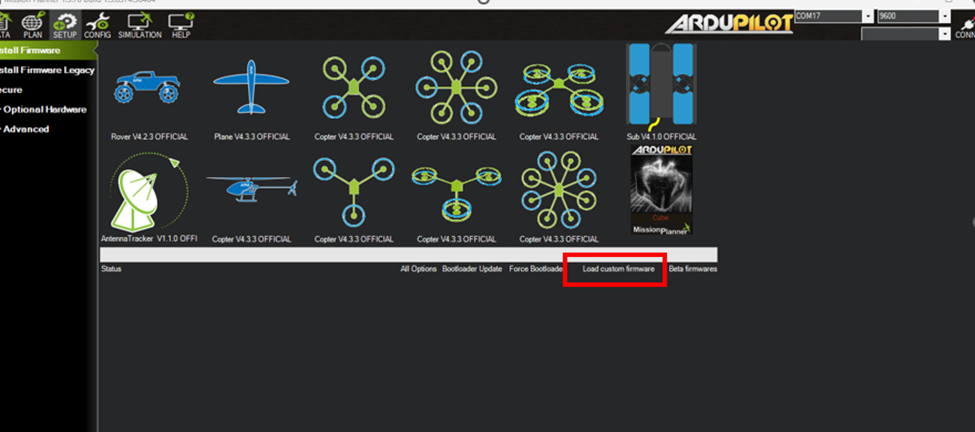
Once Load Custom Firmware is selected, you can pick the APJ file associated with the new update/Firmware save on your computer or on the downloads page of WISPR Systema and load the fle onto the Flight Controller
** A popup will show saying “Please unplug the connection and hit OK and then reinsert the cord into the port” Once you do this you should see a green progress bar loading the APJ file onto the FC.
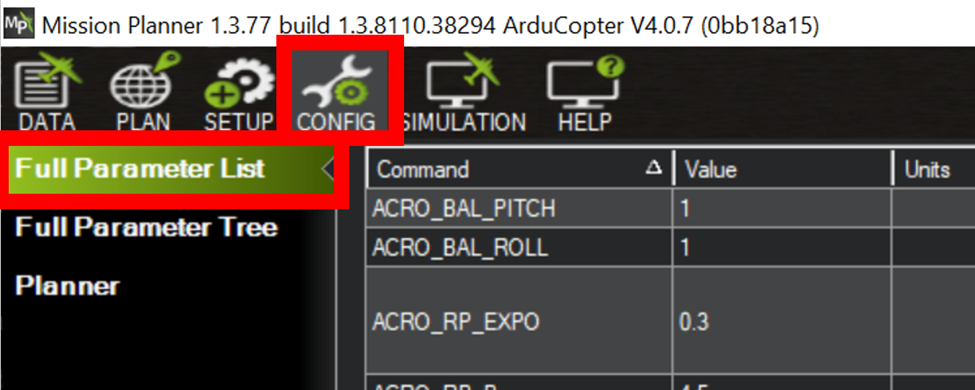
Navigate to the CONFIG tab

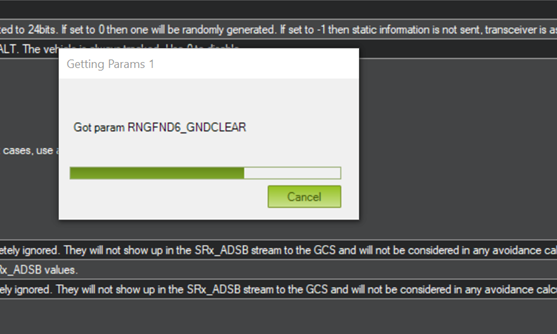
Set dropdown to auto and press connect.
Wait for the parameters to load – DO NOT CANCEL
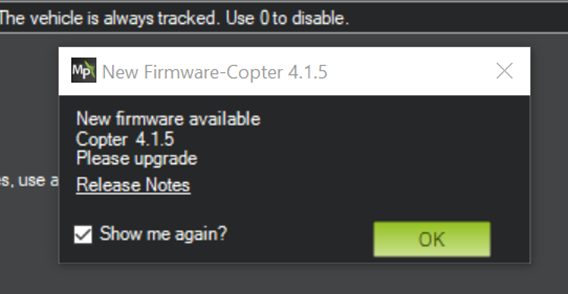
Exit out of the firmware upgrade window by pressing OK or X, unless you would like to upgrade your Mission Planner. Suggested this should be done at another time.
Load From File and choose the .param file for the first upload. (currently Ranger1100_Master3.param) This will be saved on the computer. Be sure it is the Master 3 Param.
Upload parameter via .param file
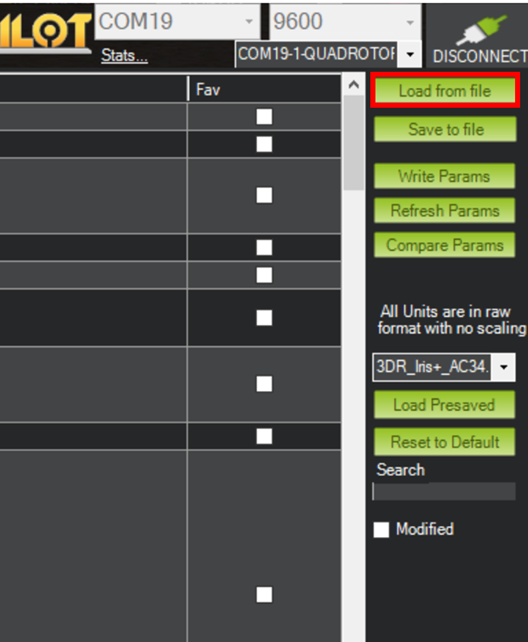
A lot of pop up windows will appear. Press okay and yes on all popup windows.
Press write params
Wait for the green bar to complete at the top of the window. If freezes press refresh params (may take more than once)
Upload prameter via .param file a second time using the same steps as before and press write params
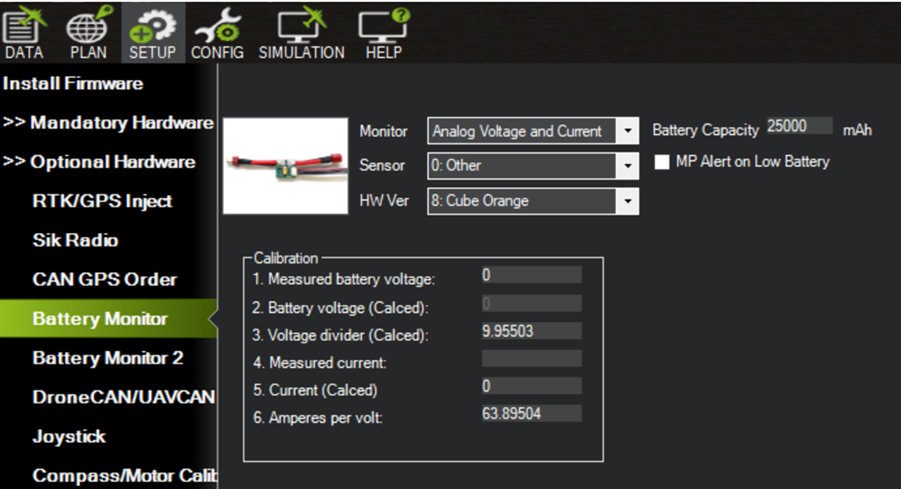
Navigate to the setup tab -> Optional Hardware -> Battery monitor and Enter in mauch data listed on check list sheet. THIS IS VERY IMPORTANT AND MUST BE ENTERED IN CORRECTLY!
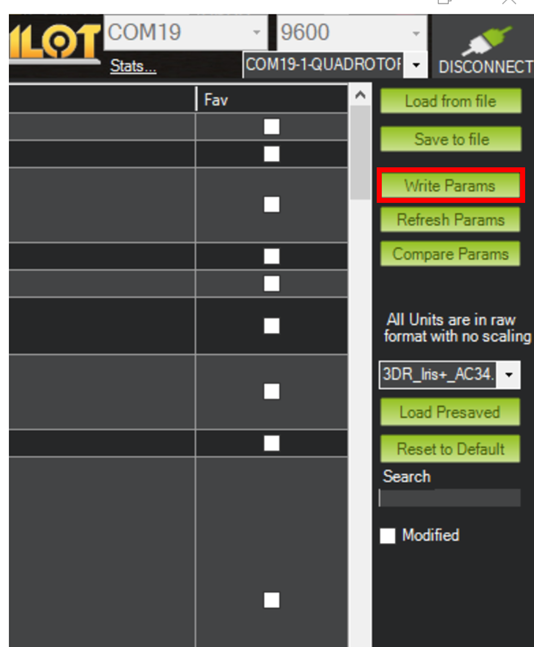
Navigate back to the Config -> Full Parameter List
and press Write Params
Navigate to the Setup tab -> Mandatory Hardware -> Compass and Check the order the compasses are listed in – UAV CAN compass should be top priority. Ensure the UAV CAN compass shows as External and secondary compass shows as internal.

Power the drone. Propellers must be moved while powered on indoors!!
Navigate to Setup → Optional Hardware → Motor Test. Change throttle to 15% and duration for 5s.
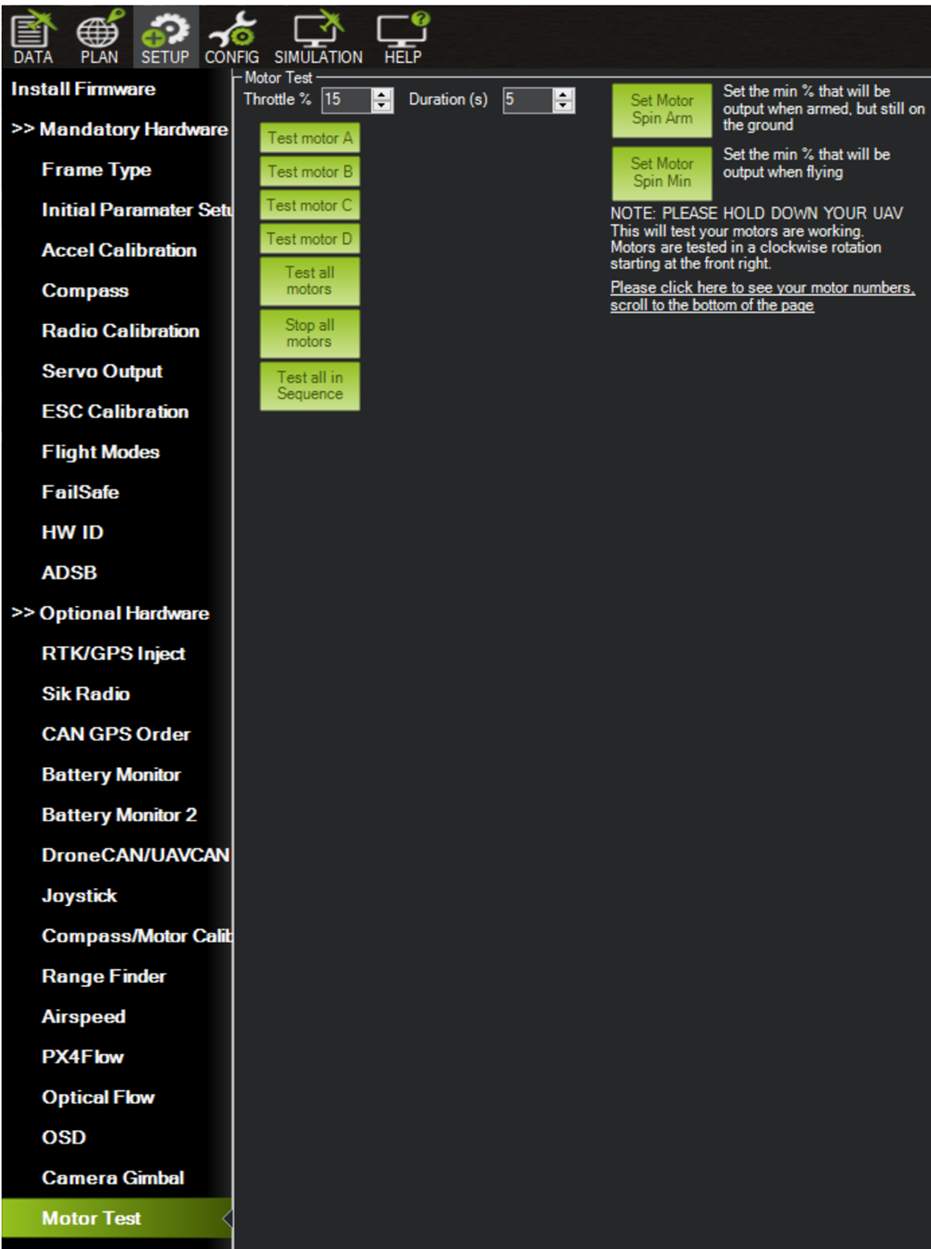
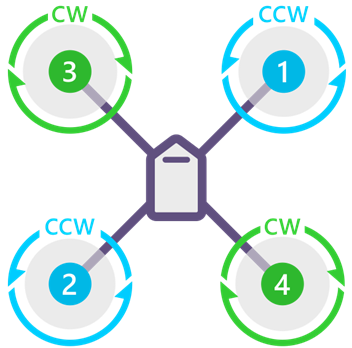
Check motor direction:
MotorA=Motor1 (CCW)
MotorB=Motor4 (CW)
MotorC=Motor2 (CCW)
MotorD=Motor3 (CW)
Navigate to the Data tab.
Check ESC 1-4 data and voltage and current data show up (drone must be powered)
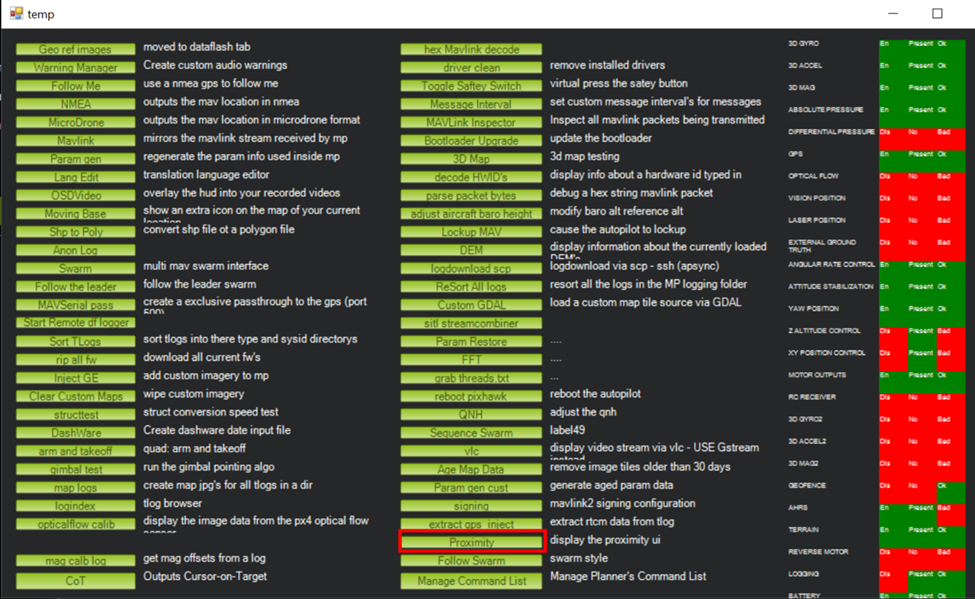
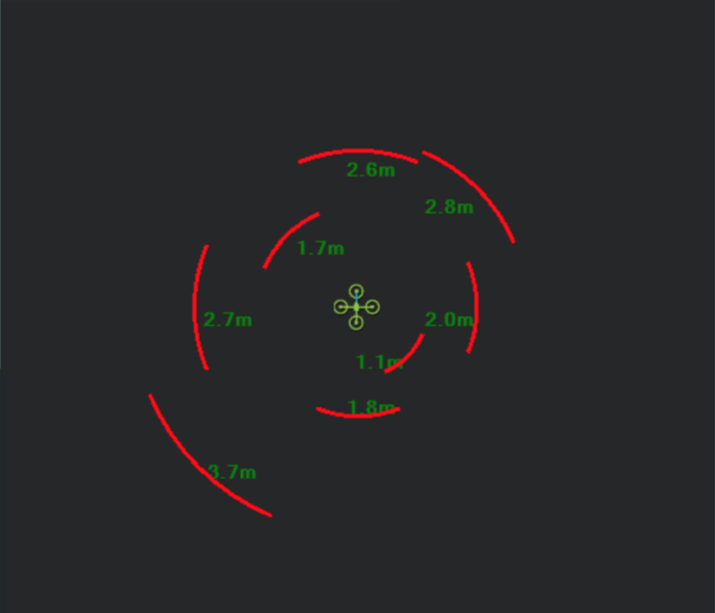
Check prx sensor by pressing Ctrl+F. A window will appear. Press Proximity.
If the proximity sensor works good the following will show:
Finally, press the calibrate ESC button under Setup → Mandatory Hardware
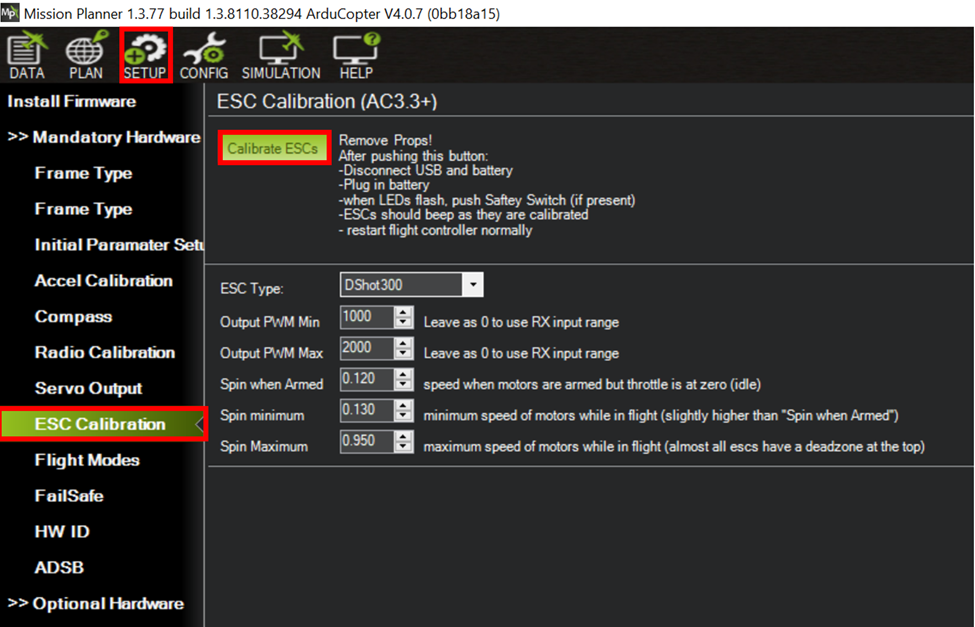
Reboot Drone – ESC will calibrate, you will here a series of beeps. Unplug. The drone is now configured.
Troubleshooting:
· If on the initial takeoff, the drone is flying weird, taking commands weird or looking as if it is toilet bowling then the drone should be landed, and the sticks should be calibrated in the Smart Controller Herelink Settings and inside of WGC. Once this is done make sure to fly again and see if this fixes the problem of the drone flying in a weird pattern. If so, then you are set
o If recalibrating the sticks does not fix the problem, you should check all props and motors to make sure they are secure, and none are loose which could also cause the drone to pull to the left or right.
· When setting the drone up or calibrating through QGC, if the compass is showing as 2 and 3 or does not have a check mark beside the main compass as external
o Disconnect from Mission Planner then reconnect and see if they are in the right order and if the checkmark is beside the UAV CAN as pictured above.
o If they are still not correct, reflash the firmware onto the drone. Go to the calibration page in QGC on the controller and see if it list them correctly.
· If a motor is spinning in the opposite direction, it should be, the ESC or the motor or wired backwards. Fix this, checking the motor first then the ESC and once fixed, check that all motors are spinning in the correct orientation now
· When arming you get the error of calibration still running. Check controls in Herelink Settings and confirm R,Y and W are reversed. Not reversing the left throttle stick could cause it to try to go into calibration when arming.